
The Hidden Thieves Stealing Your Home’s Comfort and Cash
Do you ever sit on your couch, heater running at full blast, yet you still feel a mysterious shiver crawl down your neck? You look at your thermostat. It says 72 degrees. But your feet tell a different story. They feel like they are resting on a block of ice.
This is the frustrating reality for thousands of homeowners. You work hard to pay your bills. You expect your home to be your sanctuary. Instead, you find yourself wearing two sweaters indoors while your money literally disappears into thin air.
I remember talking to a friend who was nearly in tears over her winter energy bill. She had kept the house at a modest temperature. She had thick curtains. Yet, her bill was higher than her car payment. "It feels like I'm trying to heat the whole neighborhood," she told me.
She wasn't wrong. Most homes have "hidden holes." These aren't holes you can see with your eyes, like a broken window. These are tiny gaps around pipes, wires, and attic hatches. Together, they act like leaving a window wide open all year long.
It is exhausting to fight a battle against an invisible enemy. You feel helpless. You feel like your house is failing you. But it doesn't have to stay this way. You can take back control of your comfort. You can stop the "invisible thieves" from stealing your warmth and your hard-earned money.
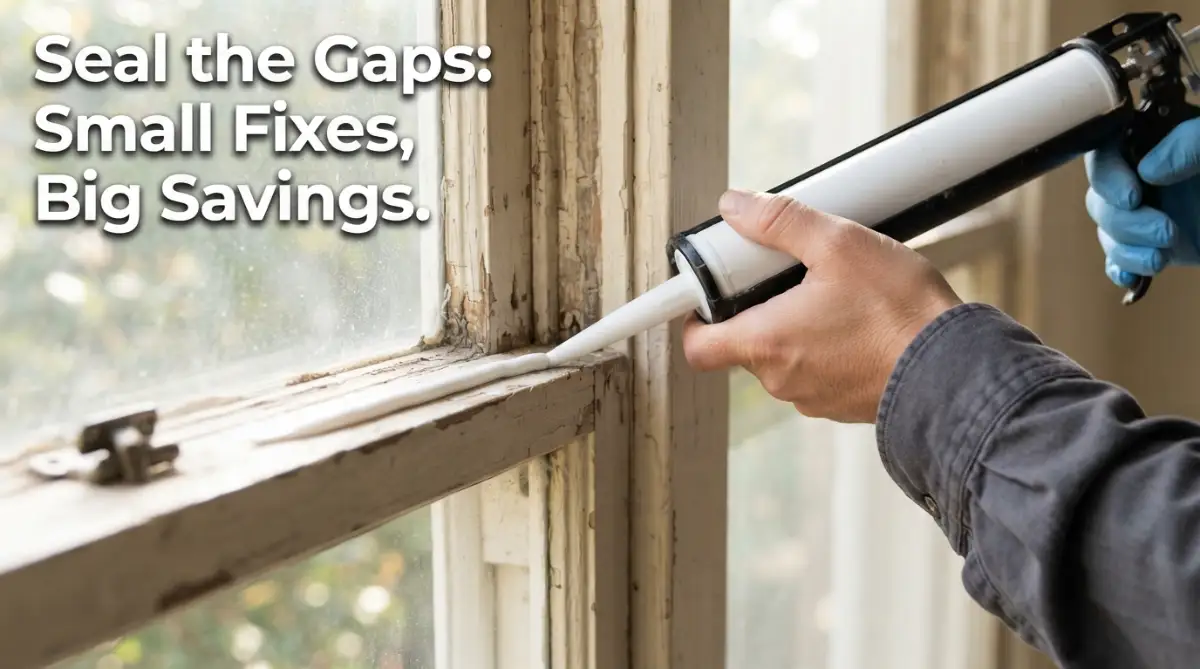
Finding the Invisible: How to Spot the Leaks You Can’t See
Before you can fix the problem, you have to find it. Air is invisible, so this feels like detective work. But you don't need expensive gadgets to start. You just need a bit of patience and a few simple tricks.
The Power of the Simple Incense Stick
One of my favorite ways to find a draft is using a common incense stick. Choose a day when it is windy outside. Turn off your heater or air conditioner so the air inside is still.
Light the incense and walk slowly around your windows. Watch the smoke. If the smoke stays steady and rises straight up, you are safe. But if the smoke starts to dance or blows sideways, you found a leak.
Check the corners of the window frames. Check where the window meets the sill. You might be surprised how much the smoke moves even in a "closed" window.
The Flashlight Test for Attic Gaps
Your attic is often the biggest source of air loss. Heat rises. This is a basic law of physics. In the winter, all that expensive warm air wants to go up and out through your roof.
Wait until it is dark outside. Have a partner go into the attic with a bright flashlight. Stay downstairs in the rooms below. Have your partner point the light at areas where pipes or wires go through the ceiling.
If you see light shining through from the attic, you have a major air leak. These are often called "bypasses." They are like chimneys that suck the air right out of your living space.
Why Your Attic is Like a Leaky Hat
Think of your home like your body in the winter. You wear a warm coat, but if you don't wear a hat, you lose all your heat through your head. Your attic is the "head" of your house.
Most people think insulation is enough. They see a thick layer of pink or gray fluff and think they are safe. But insulation is like a wool sweater. It keeps you warm, but it doesn't stop the wind.
If you have a wool sweater on and the wind blows, you get cold. You need a windbreaker over the sweater. Sealing air leaks is like putting on that windbreaker. It stops the movement of air so the insulation can actually do its job.
The Common Culprits in Your Windows
Windows are famous for being drafty, but it isn't always the glass. Most of the time, the air leaks through the moving parts or the frame.
Worn Out Weatherstripping
Open your window and look at the rubber or felt strips on the edges. Do they look flat? Are they cracked or peeling? Weatherstripping is the first line of defense.
When it gets old, it loses its "spring." It no longer creates a tight seal when the window closes. This allows outside air to whistle right through the gaps. Replacing this is one of the cheapest and most effective things you can do.
The Mystery of the Window Pulley
If you live in an older home, you might have "weight and pulley" windows. These have a cord that goes into a hole in the side of the frame.
That hole leads directly into a hollow wall cavity. That cavity is often filled with cold air from the outside. These holes are tiny, but they act like a vacuum, pulling cold air into your room all day and night.
How to Seal the Attic Hatch Once and for All
The attic hatch or "scuttle hole" is often the most neglected part of a home. It is basically a big hole in your ceiling covered by a loose piece of plywood.
If you go into your attic, look at the edges of the hatch. Do you see dark stains on the insulation nearby? That is a sign of an air leak. The insulation is acting like a filter, trapping dirt as the air rushes past it.
Using Foam Weatherstripping for a Tight Fit
To fix this, treat the attic hatch like a door. Apply thick, self-adhesive foam weatherstripping to the "ledge" that the hatch sits on.
When you close the hatch, the weight of the wood should compress the foam. This creates a solid seal. If the hatch is lightweight, you can use small hooks to pull it down tight against the foam.
Adding an Insulation "Cap"
Don't stop at just sealing the edges. That piece of wood has zero insulation value. You can glue a piece of rigid foam board to the top of the hatch cover.
This keeps the heat from escaping through the wood itself. It is a simple two-step fix: seal the gap, then insulate the surface. Your hallway will feel warmer almost instantly.
Tackling the "Swiss Cheese" Ceiling
Every time a plumber or electrician works on your house, they drill holes. They drill holes for water pipes, vent stacks, and electrical wires.
Usually, these holes are much bigger than the pipe or wire itself. These gaps are hidden behind your drywall or under your attic insulation. I call this the "Swiss Cheese" effect. Your ceiling is full of holes you can't see.
The Magic of Expanding Spray Foam
For these medium-sized gaps, a can of expanding spray foam is your best friend. This stuff starts as a liquid and grows to fill the entire space.
It gets into every crack and crevice. Once it hardens, it is a permanent air barrier. Just be careful! A little goes a long way. It is fun to watch it grow, but it can be messy if you use too much.
Handling Electrical Box Leaks
Look at your ceiling lights. Specifically, look at recessed "can" lights. Unless they are rated as "IC-Rated" (Insulation Contact) and "Airtight," they are basically vents for your heating system.
Warm air goes into the light fixture, travels up the housing, and escapes into the attic. You can buy special "fire-rated" covers for these lights in the attic. You place the cover over the light and seal the base with foam. This keeps the air in your room while keeping the light safe from overheating.
Sealing the Top Plates: The Pro Secret
If you want to be a true home energy expert, you need to know about "top plates." These are the wooden boards that sit on top of your wall studs.
In the attic, you can see these boards if you move the insulation aside. There is usually a small gap between the wood and the drywall. Air flows up through the walls of your house and out through these gaps.
By running a bead of caulk or a thin line of spray foam along these top plates, you seal off the "walls" of your home. This prevents the "stack effect" where your house acts like a giant chimney.
The Science of the Stack Effect
Why is air sealing so important? It comes down to physics. Inside your home, warm air is lighter than cold air. The warm air rises to the ceiling.
As it pushes against the ceiling, it finds those tiny holes in the attic. It escapes outside. This creates a vacuum in the lower parts of your house.
This vacuum then sucks cold air in through your windows, doors, and even your electrical outlets. This is why sealing the "top" (the attic) often fixes the drafts at the "bottom" (the windows and doors).
Window Caulking: Inside vs. Outside
Many people ask me, "Should I caulk the inside or the outside of my windows?" The answer is actually both, but for different reasons.
Inside Caulking for Air Sealing
The inside caulk is what stops the air from moving. You want to seal the gap between the window trim and the wall. Use a "paintable" caulk so you can match your wall color later.
Apply a thin, steady bead. Smooth it with your finger or a wet tool. This prevents that "whistling" sound you hear on windy nights.
Outside Caulking for Water Protection
The outside caulk is mostly to keep water out. If water gets behind your window frame, it can cause rot and mold.
Check the exterior of your windows every year. Look for caulk that is peeling away or has gaps. Use a high-quality "exterior silicone" caulk for this. It can handle the sun and the rain without cracking.
Don't Forget the Basement and Rim Joists
While we are focusing on the attic and windows, it is important to mention the basement. The "rim joist" is the area where your house sits on the foundation.
This is often full of gaps. If you seal the attic but leave the basement open, the "stack effect" will still pull cold air into your basement.
Using rigid foam boards and spray foam on the rim joists can stop the cold air at the entry point. This makes your floors feel much warmer.
The Myth of the "Breathing" House
Some people worry that sealing their home too tight is bad. They say, "A house needs to breathe." This is a common myth.
A house needs fresh air, but it shouldn't "breathe" through random holes in the attic. That is uncontrolled ventilation. It brings in dust, pollen, and moisture.
It is better to "seal tight and vent right." You seal the accidental holes and then use your kitchen fans, bathroom fans, or a dedicated ventilation system to bring in fresh air when you need it. This gives you control over your air quality and your energy costs.
Tools You Need for the Job
You don't need a massive toolbox to seal your home. Here are the basics:
- A Caulking Gun: Get a decent one with a smooth release.
- Silicone and Acrylic Caulk: Use silicone for glass and wet areas, acrylic for trim.
- Expanding Spray Foam: Get the "Gaps and Cracks" version.
- Weatherstripping: Foam tape or V-seal strips.
- Utility Knife: For cutting foam and old caulk.
- A Good Ladder: Be safe when working in the attic!
The Immediate Benefits You Will Notice
Once you spend a weekend sealing these leaks, the change is almost instant. You will notice the heater turns on less often. The house stays quiet because sealing air also seals out noise.
But the best part is the comfort. You can sit near a window without feeling a chill. You can walk across the floor without thick socks. You have turned your house back into a home.
Why DIY is the Way to Go
Hiring a professional to seal air leaks can be expensive. They often charge by the hour, and it takes time to find every small hole.
But you know your house better than anyone. You know which room feels the coldest. You know which window rattles in the wind. By doing it yourself, you save on labor costs and you ensure the job is done with care.
It is a low-risk, high-reward project. Most of the materials cost less than $20 at a local hardware store. One weekend of work can save you hundreds of dollars over the next few years.
Planning Your Air Sealing Strategy
Don't try to do everything in one hour. Start with the "big hits."
- The attic hatch.
- The plumbing stacks in the attic.
- The most drafty window in your bedroom.
Once you finish those, you will feel the success. It will motivate you to keep going. Every gap you close is a victory for your wallet and your comfort.
Stay Safe in the Attic
Attics can be dangerous. Always wear a mask (N95) because insulation fibers are bad for your lungs. Wear long sleeves and gloves.
Only step on the wooden ceiling joists. If you step on the drywall, you will fall through the ceiling! Bring a portable light so you can see clearly into the dark corners.
If the attic is too hot, wait for a cool morning. If it is too cramped, take frequent breaks. Your safety is more important than a sealed hole.
Summary of Part 1
We have looked at how to find leaks using smoke and light. We explored why the attic is the most important area to seal. We discussed the specific gaps around windows and pipes.
Sealing these hidden leaks is the "secret weapon" of energy efficiency. It is cheaper than new windows and more effective than just adding more insulation.
In the next section, we will look at more advanced window techniques and how to handle larger gaps that require special materials. We will also talk about how solar energy fits into a well-sealed home. Stay tuned as we continue this journey to a perfect home!
Mastering the Art of a Truly Airtight Home
Now that you have spotted the main gaps, it is time to think like a professional energy auditor. Most people stop at the easy stuff, but the real savings happen when you look at the complex areas. We are going to explore some expert techniques that move your home from "okay" to "highly efficient."
High-Tech Hunting: Using Thermal Imaging on a Budget
You don’t need to spend thousands of dollars on fancy gear. These days, you can buy or even rent a small thermal camera that plugs into your smartphone. This tool is a game-changer for finding hidden leaks.
When you look through a thermal lens, cold air looks like dark blue streaks or "ghostly" fingers stretching across your ceiling. Warm air looks bright orange or red. It makes the invisible visible.
Wait for a very cold day or a very hot day. Walk around your attic hatch and window frames. You might find that air is leaking through the glass pane itself or through the weight pockets inside the wall. Seeing it on a screen helps you know exactly where to point your caulk gun.
The "Knee Wall" Secret Most Homeowners Miss
If you have a finished room in your attic, you likely have "knee walls." These are the short walls that lead to the slanted part of your roof. Behind these walls is a small, triangular space that is often very drafty.
Many people think the insulation in that small space is enough. It usually isn't. The floor joists often run right under that wall, carrying cold air directly into the floor of your bedroom.
You can stop this by using "blocking." This means cutting pieces of rigid foam or wood to fit between the floor joists under the wall. Seal the edges with spray foam. This creates a solid barrier that keeps the cold attic air out of your living space.
Sealing the Solar Connection Points
If you are a fan of green energy, you probably know that why your solar panels underperform is often due to poor setup or placement. But did you know that the way your solar wires enter your house matters too?
When solar installers run cables from the roof into your attic, they drill holes. If those holes aren't sealed perfectly, they act like a straw, sucking out your heat.
Check the area where the solar conduits come through the roof or siding. Use a high-quality exterior sealant to fill any gaps around the pipes. This protects your energy investment and ensures your home stays cozy.
The Science of Choosing the Right Sealant
Not all "goop" is the same. I have seen many people use cheap bathroom caulk on their windows, only to see it peel off six months later.
For windows, you want something that stays flexible. Windows expand in the sun and shrink in the cold. If your caulk is too stiff, it will crack. Look for "high-stretch" acrylic or 100% silicone.
In the attic, fire-rated foam is a must around chimneys or flues. Regular foam can melt or catch fire if it gets too hot. Check the label before you spray. Taking a few minutes to read the fine print can save you from a big headache later.
Understanding the Pressure Balance
Your home is like a living, breathing system. When you seal the top and the bottom, you change how air moves. This is why it is so important to look at your home as a whole.
When you finish sealing the attic, you might find that your home feels less "stuffy" if you also manage your airflow. This is a great time to learn about slash your summer energy bills with passive cooling hacks. By combining a tight seal with smart airflow, you get the best of both worlds.

Dangerous Pitfalls: What to Avoid at All Costs
I want to be very honest with you. While air sealing is great, doing it wrong can be dangerous. The biggest mistake is "over-sealing" near gas appliances.
The Carbon Monoxide Risk
Your furnace and water heater need air to burn gas safely. They also need a way to push exhaust fumes out of the house. If you seal every single tiny crack in a small basement, you might starve these machines of air.
This can cause "back-drafting." This is when the toxic fumes, like carbon monoxide, come back into your house instead of going out the chimney. Always make sure your gas appliances have enough "combustion air." If you aren't sure, call a pro to check the air pressure in your utility room.
Blocking the Attic Soffit Vents
Another common mistake happens when people get too excited with insulation and foam. They often cover the "soffit vents" at the very edge of the attic.
These vents are meant to let fresh air in so your roof stays cool and dry. If you block them, moisture will get trapped in your attic. This leads to mold, wood rot, and "ice dams" in the winter.
Use "baffles" or vent guards. These are plastic or foam pieces that keep the insulation away from the vents. They allow air to flow over the insulation while keeping the heat inside your rooms below.
Caulking Over Rotten Wood
I have seen people try to fix a drafty window by putting thick layers of caulk over soft, gray wood. This is like putting a bandage on a deep wound that hasn't been cleaned.
If the wood is rotten, caulk won't stick. More importantly, you are trapping moisture inside the wood, which makes the rot grow faster.
Always poke the wood with a screwdriver first. If it feels soft or mushy, you need to repair the wood before you seal it. A little extra work now prevents you from having to replace the whole window later.
Ignoring the Chimney and Flue Gaps
The space around your chimney is one of the biggest "leaks" in any house. Because the chimney gets hot, builders often leave a 2-inch gap between the brick and the wooden frame of the house.
You cannot just fill this with spray foam! It is a fire hazard. You must use "flashing," which is thin sheets of metal. Nail the metal to cover the gap and use high-temperature fire-rated caulk to seal the edges.
Using the Wrong Expanding Foam
There are two main types of spray foam: "High-Expansion" and "Low-Expansion." If you use high-expansion foam around a window frame, it can actually push the frame inward as it grows.
I have seen people "stuck" with windows that won't open or close because the foam warped the wood. Always use "Window and Door" specific foam. It is designed to stay soft and not push against the frame too hard.
Thinking Solar Solves Everything
Some homeowners think that once they get solar panels, they don't need to worry about air leaks. They think, "The electricity is free now, so who cares if the heater runs more?"
This is a mistake. Even if you have solar power, do solar panels work on cloudy days is a question you should answer first to understand your energy limits.
If your house is leaky, you are wasting the clean energy your panels produce. You want that energy to power your gadgets and lights, not to be wasted on heating the outdoors. A sealed home makes your solar system much more effective.
Your Path to a Permanent Comfort Zone
You have learned a lot today. From using incense sticks to find drafts to avoiding the dangers of back-drafting. The most important thing is to just start.
Don't wait for the "perfect" time. Start with one can of foam and one tube of caulk. Fix the attic hatch first. Then do the window in the room that always feels cold.
You will start to see a change in your energy bills. But more than that, you will feel a change in your home. It will be quieter. It will be cleaner. It will be a place where you can truly relax without worrying about the next utility bill.
A Final Word from the Expert
I have seen people save 15% to 20% on their heating and cooling costs just by sealing air leaks. That is money that stays in your pocket every single month.
It is also good for the planet. When we use less energy, we reduce the load on our power plants. It is one of the easiest ways to be an "environmental hero" from the comfort of your own living room.
Go grab your flashlight. Head up to the attic. Look for those hidden holes. You have the knowledge and the tools to fix them. Your house is waiting for you to make it better.
The Weekend Action Checklist
- Friday Evening: Walk around with an incense stick and mark drafty windows with a small piece of painter's tape.
- Saturday Morning: Head to the hardware store. Buy "Window and Door" foam, 100% silicone caulk, and a roll of weatherstripping.
- Saturday Afternoon: Seal the attic hatch and any visible gaps around attic pipes or wires.
- Sunday Morning: Remove old, cracked weatherstripping from windows and install the new stuff.
- Sunday Afternoon: Check the exterior of your windows and apply fresh caulk where needed.
You can do this. It isn't about being a master carpenter. It is about being a smart homeowner who cares about comfort and savings. Enjoy your new, cozy, draft-free home!
General Disclaimer: This guide is for informational purposes only. When working in attics or with tools, always follow safety guidelines provided by manufacturers. If you are unsure about gas appliance safety or structural issues, please consult a licensed professional. Always wear protective gear, including masks and gloves, when handling insulation or chemicals.